This tool allows you to easily place items in the game Sprocket in patterns by modifying the blueprint file for your vehicle. RASPP isn't meant to replace the game, rather be an add on for the people who like to use the blueprint files as a way to edit vehicles.
Download the program here: ~LINK TO EXE

Here is a not-so-quick guide on how to use RASPP:
-
Place the desired part on your vehicle in Sprocket. Make sure to place it where you want the pattern to start, and that it is correctly rotated and scaled the way you want.
-
Save the vehicle in Sprocket
-
SAVE A COPY OF THE VEHICLE BEFORE MAKING ANY CHANGES TO THE BLUEPRINT FILE! I am not responsible for you messing up your blueprint.
-
Open your Sprocket blueprints folder, which can be found at
C:\Users\[You]\Documents\My games\Sprocket\Factions\[Your Faction]\Blueprints\Vehicles -
Open the
.blueprintfile of your vehicle -
Find the part that you want to clone. This can be tricky, so look at the part reference number (REF) (lookup table coming soon) and the compartment ID (CID), as well as the location/rotation/scale of the part to try to find the right one.
-
Copy the part information into RASPP by pasting it in the
Inputpopup. It should look like this:{ "REF": "0633ffdf766e3394eb79f8e8a7be24ba", "CID": 0, "T": [ -0.46639204, 0.591725945, -3.118866, 3.58584948E-05, 89.99991, 245.606354, 0.799310863, 0.500000238, 0.9819551, 0.0 ], "DAT": [] },After pasting the information, hit the
OKbutton to automatically fill the information into the boxes in RASPP. -
Use the buttons in the top row to select how you want the part to be cloned. You can enter either an amount of parts, or select an axis to move on until a certain coordinate is hit.
-
Enter increment amounts for each axis you want to be incremented. This value changes how far apart each part is or how much more it is rotated or scaled.
-
Change any values that you want to change. You can move the part, rotate it or scale it (RASPP cannot scale parts beyond the limits of the game) however you like.
-
Select where you want to save the output file and give it a name using
File -> Change Save LocationorCtrl + S -
Once you have all of your values filled, press the
Go!button. The output file you saved before should now be populated with parts. -
Paste the output over the original part. Otherwise, you can end up with stacked parts, or any changes you made to the part might not be saved.
-
Save and close the
.blueprintfile. -
In Sprocket, open the vehicle you changed. Even if it is already open, re-open it.
-
If you are happy with the changes, save your vehicle in-game. Otherwise, start over and change some numbers.
-
Q: I have a really good idea of something to add to the program! A: Great! Submit an issue on the GitHub Repo with the tag
suggestionand I will try to look at it. If you do want to submit a suggestion, please try to include some rough code or logic that can make your suggestion easier for me to implement. Not required, but helpful. -
Q: Where do I find the blueprint files? A: RTFM.
-
Q: Where do I look in the file to find a part? A: Parts are after the
Compartmentsand vehicle options (SS, TRK, ENG, etc) sections. If you scroll all the way down to the bottom of theblueprintfile you can find them and go up from there. You can also look for the "ext" tag in whatever text editor you're using. -
Q: My output file is blank! A: check to make sure that your amount is not zero, or that your limit is not inside of your increment (If you are trying to go from 0.75 to 1.25 in steps of 1, then you can't ever have a part, can you?). Also, make sure you are looking in the correct file. The file location can be found in
File -> Change Save Location. -
Q: How do I know which axis is which / which way negative or positive is? A: The values are ordered in the
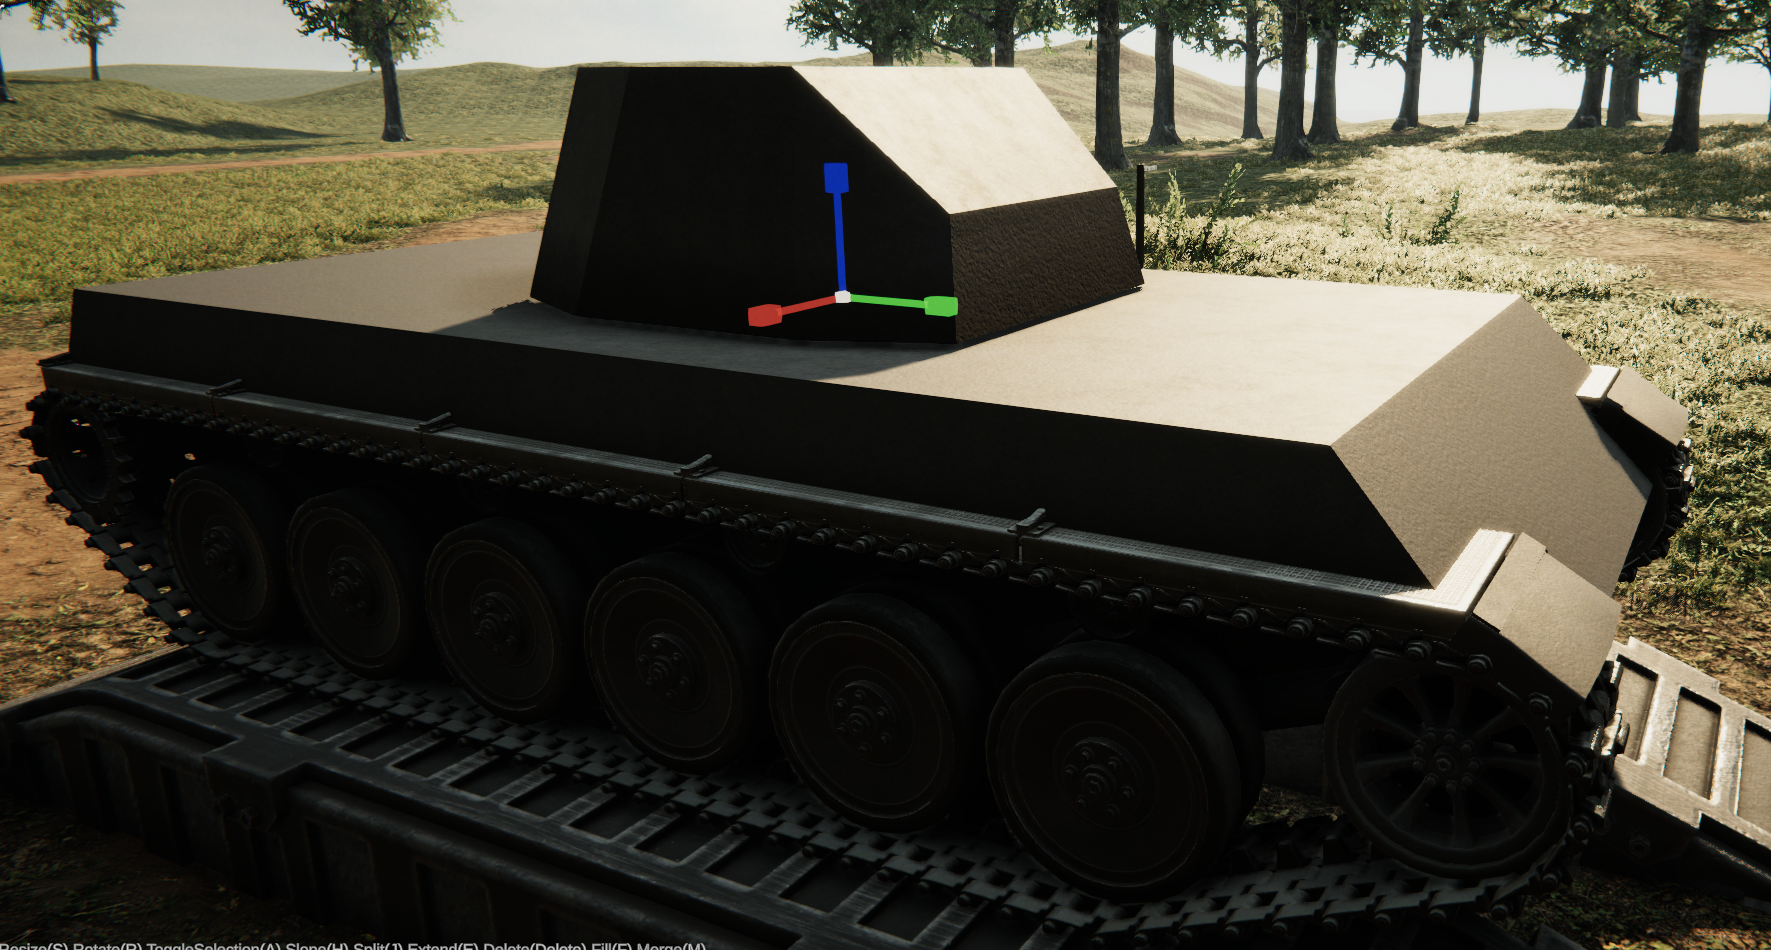
blueprintthe same way they are ordered in RASPP: Position (X, Y, Z), Rotation (X, Y, Z), Scale (X, Y, Z). The X axis is from left to right, with right being positive, Y is up/down with up being positive, and Z is front/back with front being positive. In the pictures below, X is red, Y is blue and Z is green.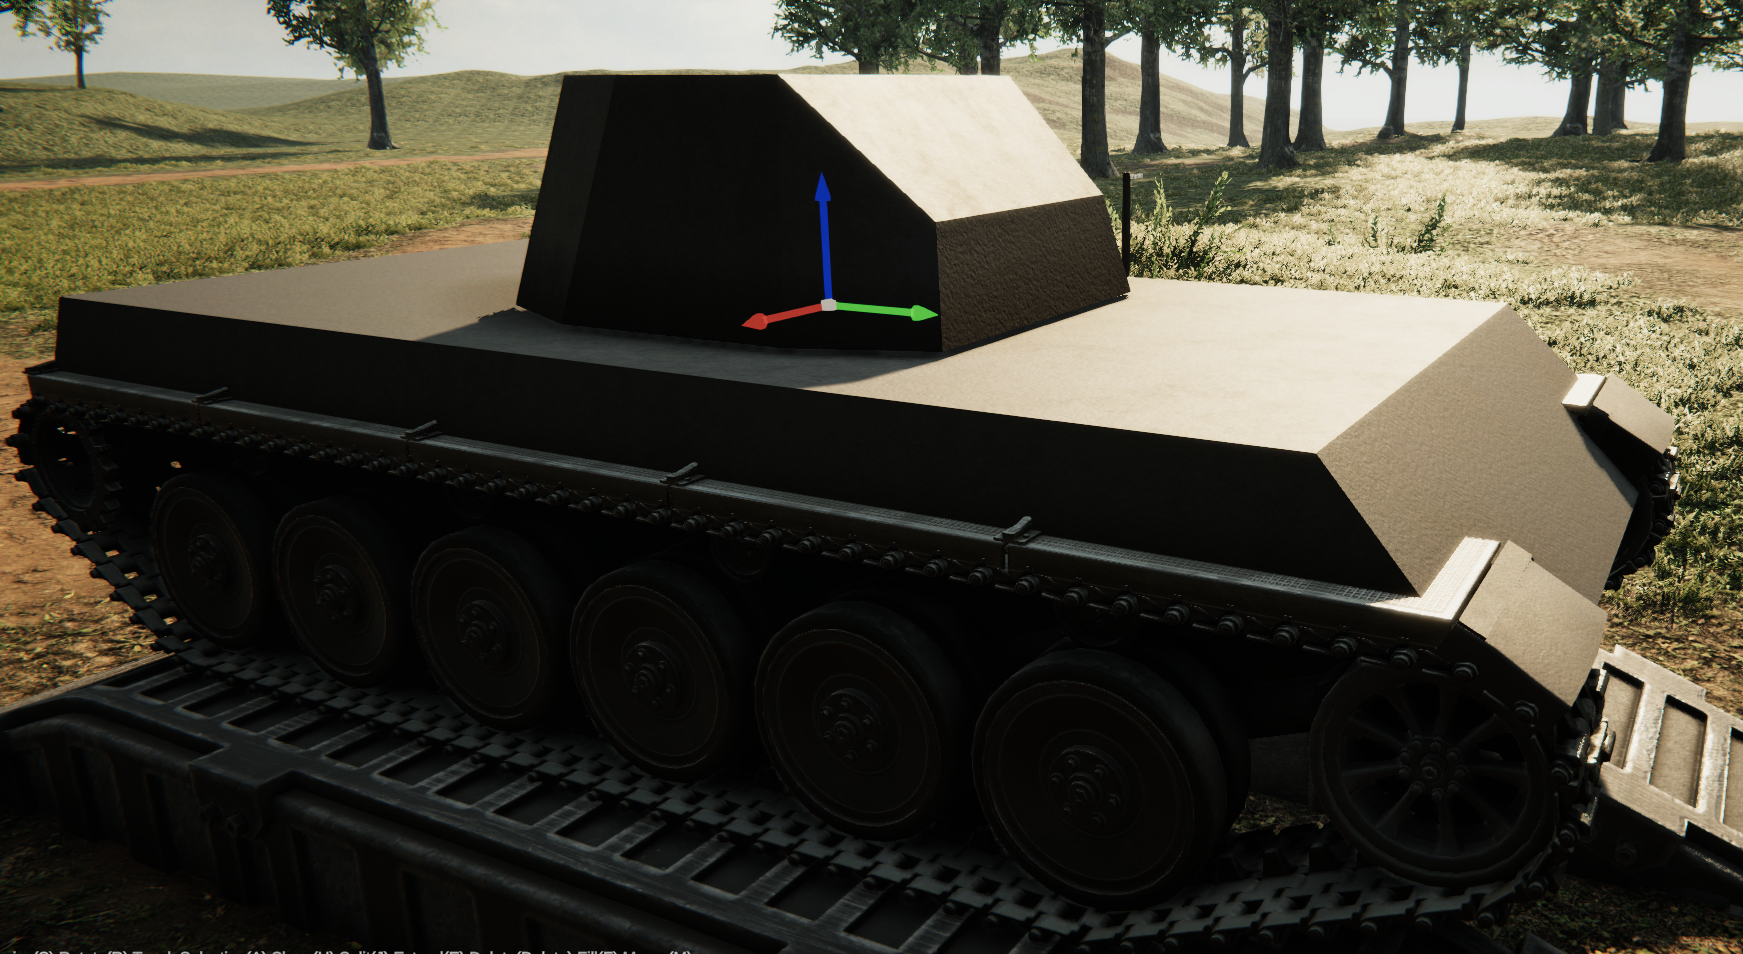

- The game Sprocket is developed by Hamish Dunn, a guy with a ton of skill. Links here:
- Steam page: https://store.steampowered.com/app/1674170/Sprocket/
- Hamish's GitHub: https://github.com/Muushy
- Sprocket's Twitter: https://twitter.com/SprocketTheGame
- A lot of the info for this project came from the official Sprocket Discord and the awesome people there.
- If you want to reach out to me about this program, the best way is to either add an issue to the GitHub repo, or you can contact me on Discord @bobby1321#0770.