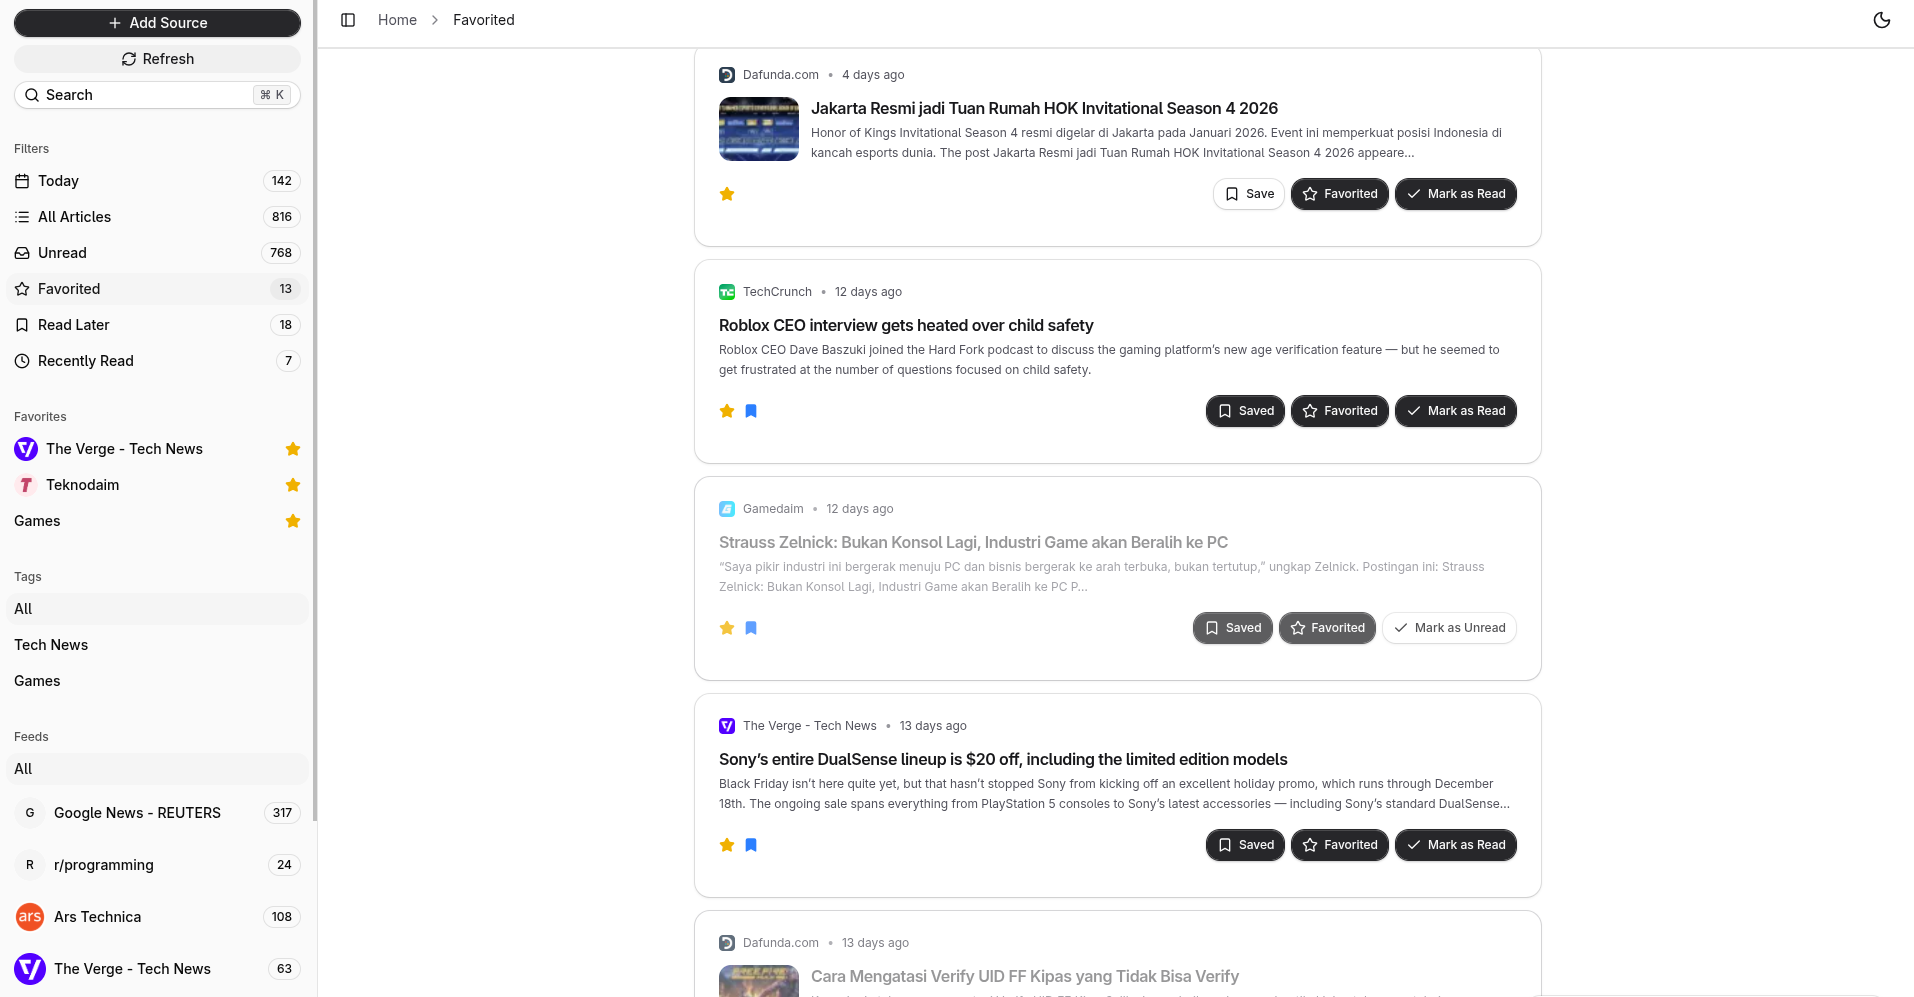
An open-source, self-hosted alternative to Feedly. A modern RSS feed reader that brings all your favorite content into one beautiful, distraction-free interface. Subscribe to RSS feeds, follow Reddit communities, track Google News topics, and organize your reading experience with powerful tagging and tracking features.
Add unlimited RSS feeds from blogs, news sites, and podcasts. Track all your favorite content sources in one centralized hub without jumping between websites.
Subscribe to any subreddit and read posts directly in your feed reader. Jump to Reddit discussions with one click while enjoying a clean reading experience.
Follow Google News topics or create custom news searches. Stay updated with the latest headlines from technology, business, science, and more through Google News RSS feeds.
Group feeds by topics, priorities, or projects with custom tags. Create your perfect organization system and find content exactly when you need it.
Never lose your place. Mark articles as read or unread, save favorites for later, and maintain a complete history of everything you've consumed.
Focus on content, not clutter. Enjoy a beautiful, distraction-free reader with customizable themes that automatically adapts to your preferences.
- Runtime: Bun
- Framework: Next.js
- Language: TypeScript
- UI: React, Tailwind CSS
- Database: PostgreSQL with Drizzle ORM
- Caching: Redis
- API: tRPC with TanStack React Query
- Authentication: OpenAuth
- Bun 1.3 or higher (replaces Node.js)
- PostgreSQL database
- Redis server
- Git
- OpenAuth Issuer - Required for authentication (setup guide)
- Docker Engine
- Docker Compose
- OpenAuth Issuer - Required for authentication (setup guide)
Note: When using Docker, PostgreSQL and Redis are provided automatically.
- Clone the repository
git clone https://github.com/yopem/read.git
cd read- Install dependencies
bun install- Set up environment variables
Copy the example environment file and configure it:
cp .env.example .envEdit .env and configure the required variables (see
Environment Variables section below).
- Run database migrations
bun run db:generate && bun run db:migrate- Start the development server
bun run dev- Access the application
Open your browser and navigate to http://localhost:3001
- Clone the repository
git clone https://github.com/yopem/read.git
cd read- Set up environment variables
cp .env.example .envEdit .env and configure the required variables.
- Build and start containers
docker-compose up -dThe application will be available at http://localhost:3069
- View logs (optional)
docker-compose logs -f- Stop containers
docker-compose down| Variable | Description | Example |
|---|---|---|
DATABASE_URL |
PostgreSQL connection string | postgresql://user:password@localhost:5432/yopem_read |
REDIS_URL |
Redis connection string | redis://localhost:6379 |
AUTH_ISSUER |
OpenAuth issuer URL (see OpenAuth Setup below) | https://auth.example.com |
NEXT_PUBLIC_API_URL |
Public API URL | https://api.example.com |
Yopem Read uses OpenAuth for authentication. You need to set up an OpenAuth issuer to handle user authentication.
-
Follow the official guide: Visit OpenAuth Issuer Documentation for detailed setup instructions
-
Deploy your issuer: You can deploy an OpenAuth issuer using:
- Your own server
- Serverless platforms (AWS Lambda, Cloudflare Workers, etc.)
- Container platforms (Docker, Kubernetes)
-
Configure the
AUTH_ISSUERvariable: Once your issuer is running, set theAUTH_ISSUERenvironment variable to your issuer's URL:AUTH_ISSUER=https://your-issuer-domain.com
-
Important: Without a properly configured OpenAuth issuer, the application will not be able to authenticate users and login functionality will not work.
For local development, you can run an OpenAuth issuer locally. Refer to the OpenAuth documentation for local setup instructions.
| Variable | Description |
|---|---|
REDIS_KEY_PREFIX |
Prefix for Redis keys |
CRON_SECRET |
Secret for protecting cron endpoints (recommended for production) |
NEXT_PUBLIC_GA_MEASUREMENT_ID |
Google Analytics measurement ID |
NEXT_PUBLIC_LOGO_URL |
Custom logo URL |
NEXT_PUBLIC_SITE_TITLE |
Custom site title |
NEXT_PUBLIC_SITE_DESCRIPTION |
Custom site description |
CF_ACCOUNT_ID |
Cloudflare R2 account ID (not yet implemented) |
R2_ACCESS_KEY |
Cloudflare R2 access key (not yet implemented) |
R2_SECRET_KEY |
Cloudflare R2 secret key (not yet implemented) |
R2_BUCKET |
Cloudflare R2 bucket name (not yet implemented) |
R2_DOMAIN |
Cloudflare R2 domain (not yet implemented) |
For a complete list of environment variables, see .env.example.
-
Access the application at
http://localhost:3001(orhttp://localhost:3069for Docker) -
Create an account or log in using the authentication system
-
Add your first RSS feed:
- Click the "Add Feed" button in the sidebar
- Enter the RSS feed URL
- Optionally add tags for organization
-
Organize with tags:
- Create tags to categorize your feeds
- Assign multiple tags to feeds for flexible organization
-
Read and track articles:
- Browse articles from all your feeds
- Mark articles as read/unread
- Save favorites for later reading
-
Keyboard shortcuts are available throughout the app for efficient navigation
The application includes automated cron job endpoints for maintenance tasks. These should be called periodically using your server's crontab.
Endpoint: GET /api/cron/cleanup-expired-shares
Removes expired article shares and disables bulk sharing for feeds that have passed their expiration date.
Recommended Schedule: Every hour
Example with curl:
curl -H "Authorization: Bearer YOUR_CRON_SECRET" \
  https://your-domain.com/api/cron/cleanup-expired-shares
What it does:
- Disables public sharing for individual articles past their expiration date
- Disables bulk sharing for feeds past their expiration date
- Disables public sharing for all articles in expired bulk-shared feeds
Endpoint: GET /api/cron/expire-old-articles
Marks articles as expired based on each user's retention settings.
Recommended Schedule: Daily (e.g., at midnight)
Example with curl:
curl -H "Authorization: Bearer YOUR_CRON_SECRET" \
  https://your-domain.com/api/cron/expire-old-articles
What it does:
- Processes all users and their article retention settings
- Marks articles as "expired" when they exceed the configured retention period
- Updates article status from "published" to "expired"
Both cron endpoints are protected by the CRON_SECRET environment variable. If
CRON_SECRET is set, you must include it in the Authorization header as a
Bearer token:
Authorization: Bearer YOUR_CRON_SECRETIf CRON_SECRET is not set, the endpoints will be publicly accessible (not
recommended for production).
Add the following cron jobs to your server's crontab (crontab -e):
# Cleanup expired shares every hour
0 * * * * curl -H "Authorization: Bearer YOUR_CRON_SECRET" https://your-domain.com/api/cron/cleanup-expired-shares

# Expire old articles daily at midnight
0 0 * * * curl -H "Authorization: Bearer YOUR_CRON_SECRET" https://your-domain.com/api/cron/expire-old-articles
Replace YOUR_CRON_SECRET with your actual CRON_SECRET value and
your-domain.com with your application's domain.
| Command | Description |
|---|---|
bun run dev |
Start development server with Turbopack |
bun run build |
Build for production |
bun run start |
Start production server |
bun run lint |
Run ESLint |
bun run lint:fix |
Run ESLint with auto-fix |
bun run typecheck |
Run TypeScript type checking |
bun run format:write |
Format code with Prettier |
bun run format:check |
Check code formatting |
bun run db:studio |
Open Drizzle Studio (database GUI) |
bun run db:migrate |
Run database migrations |
bun run db:push |
Push schema changes to database |
bun run db:generate |
Generate new migration |
bun run check |
Run all quality checks (lint, typecheck, format) |
This project is licensed under the AGPL-3.0-or-later license. This is a copyleft license that requires any derivative works to be distributed under the same license terms.